
![]() If you need to extend your Material Master view tabs then this article will show how you can do it in few simple steps.
If you need to extend your Material Master view tabs then this article will show how you can do it in few simple steps.
Let’s have an example where we’d like to add some Plant-specific fields to the Material Master and we’d also like these fields to be visible and editable in MM transactions MM01 / MM02 / MM03.
In the example we will add new field Process Code (ZZ_PROCCODE) to the MM View named General Plant Data / Storage 1
Extending the master table
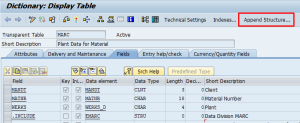
- Go to TCode SE11 and display table for plant-specific fields (MARC)
- Extend an existing or create new custom Append for MARC table- it will be a normal structure (will be editable in SE11) which will be appended at the end of the table
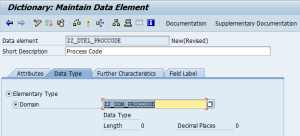
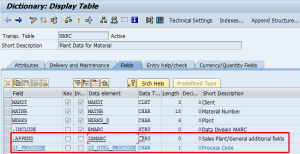
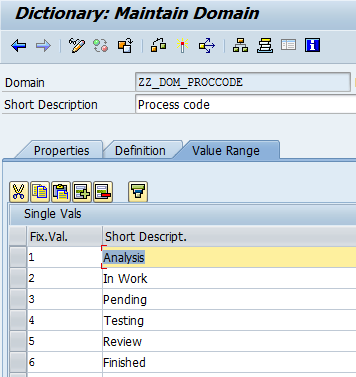
- Add your fields to the Append-structure – In our example we will add field for storing a process code called ZZ_PROCCODE of type ZZ_DTEL_PROCCODE built on domain ZZ_DOM_PROCCODE.

- Activate the append structure -> this will trigger the MARC table (and all depending tables/structures) adjustments – this can be quite time consuming so take care when doing such change in production environment


Create/Extend own sub-screen
- Create new function group (you can skip this step if you already have a FUGR created for this purpose) where you define new sub-screens which will contain your custom fields.
!!! STOP !!!
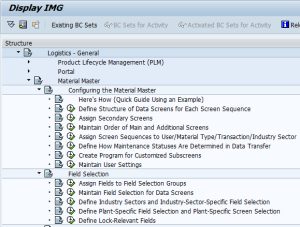
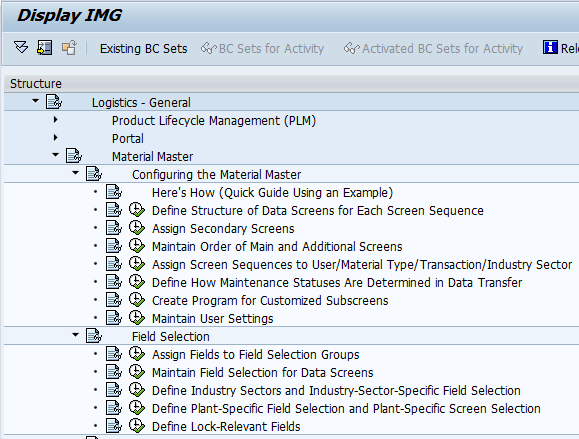
Do not create the FUGR manually but go through customizing for the MM views in SPRO IMG -> Logistics General -> Material Master -> Configuring the Material Master -> Create Programs for Customized Subscreens
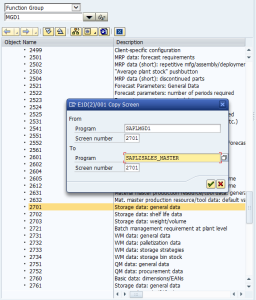
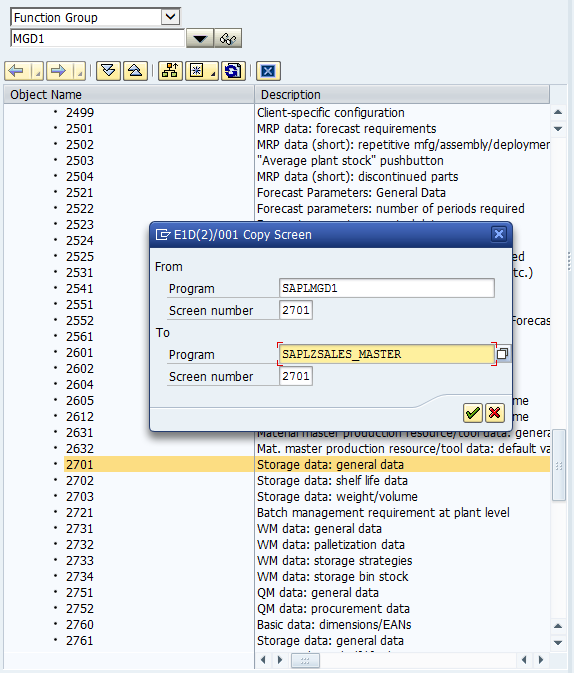
Let’s call our new FUGR ZSALES_MASTER. - In SE80 display FUGR MGD1 and select the screen (MM View sub-screen) you want to enhance with your own fields – in our case it will be screen 2701 (Storage data: general data)
- Copy the selected screen from MGD1 to your FUGR (keep its current number)
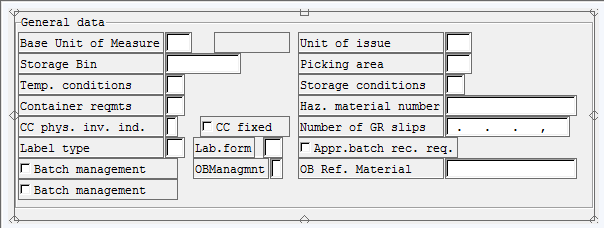
- Using Screen Painter edit the new screen in your FUGR (in our case screen 2701) and rename the group to some custom text describing the group of fields you’re going to put inside. Then delete all fields from the screen and put there only your custom fields.
…the original layout will be changed from this

… to the following

- Save and activate your new screen
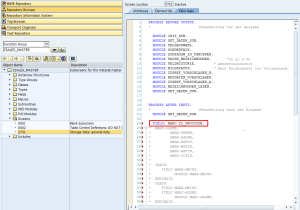
- In SE80 open the screen (in our case 2701) and go to tab Flow logic
- In the code displayed remove (or comment out) all lines manipulating with fields that no longer exist in the screen and replace them with commands that will manipulate with your own custom fields. Be careful – don’t remove (comment out) module calls MODULE GET_DATEN_SUB and MODULE SET_DATEN_SUB – these are responsible for reading data from database and putting them back once you change them in the MM views.
- Activate all changes in the custom FUGR (added screen, its layout and flow logic)

Add the new subscreen to the standard MM Views
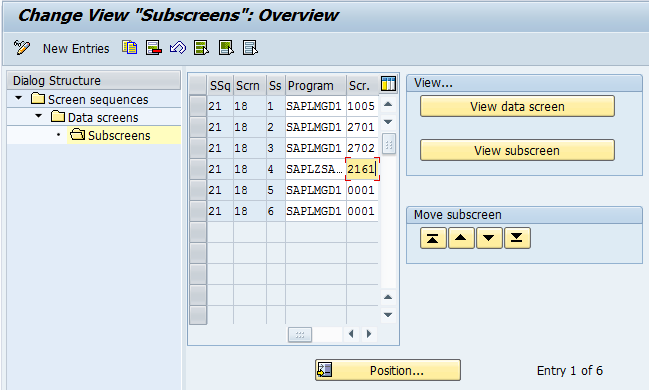
- Go to customizing for the MM views in SPRO IMG -> Logistics General -> Material Master -> Configuring the Material Master -> Define Structure of Data Screens for Each Screen Sequence (Tcode OMT3)
- Now you can either create your own screen sequence (by copying some of the existing ones) or just modify one of the already prepared ones – we will go to update already existing one (21 – Standard Industry: Tab pages)
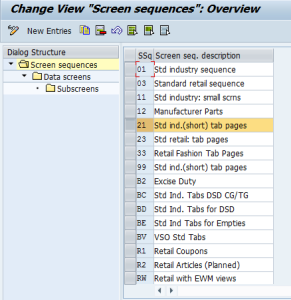
- select the line and double-click on Data Screens

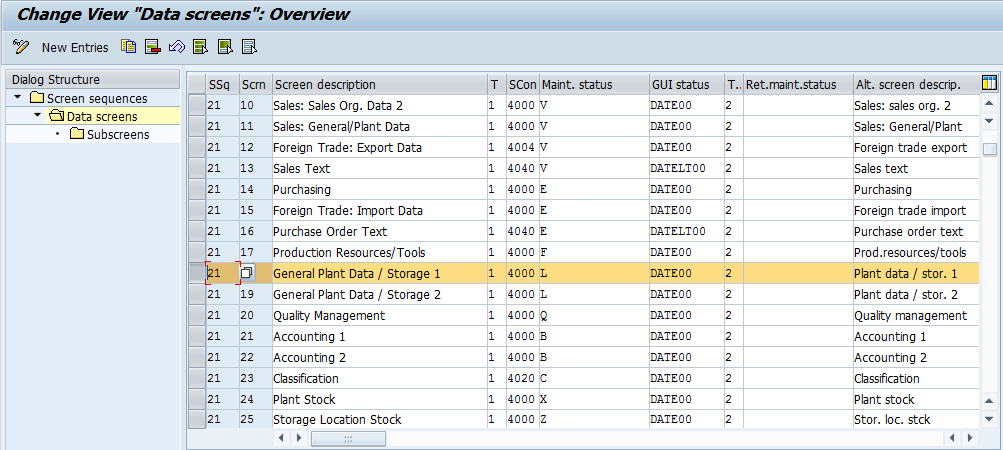
- Now select the line with Screen Desription General Plant Data / Storage 1 and double-click on Subscreens

- Here you can preview the whole screen with its all sub-screens by pushing the button View Data Screen
- You can see your custom sub-screen is not visible … yet 🙂
- Go back and select the first line where PROGRAM = SAPLMGD1 and SCREEN=0001 (screen 0001 is a dummy/empty screen), click on the Add new Entries button and replace the program name with SAPLZSALES_MASTER (main program of your FUGR) and put your own screen number (2701)
- Press SAVE button (you will be asked for a transport number) and voila …YOU ARE DONE 😎

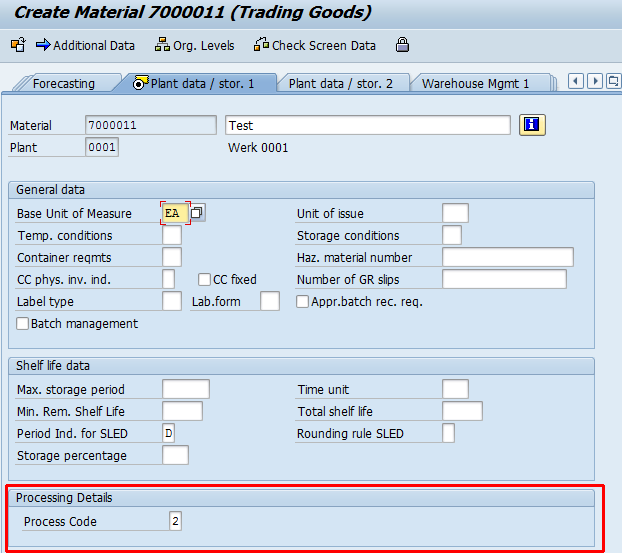
To test your new screen go to MM01 or MM02
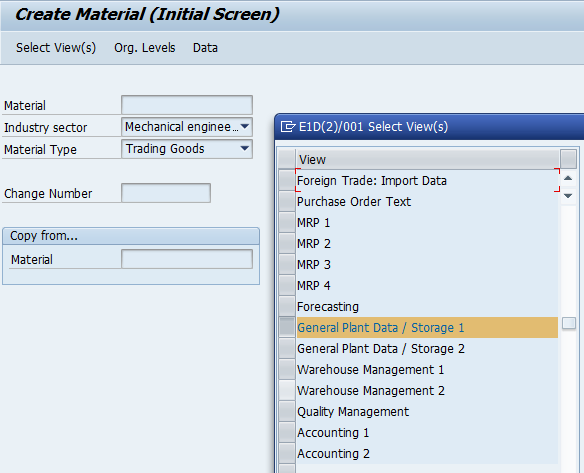
Check in the General Plant Data / Storage 1 tab, that your new field (ZZ_PROCCODE) in your new sub-screen (2161) is visible. Change its value, enter all other required fields and save changes.
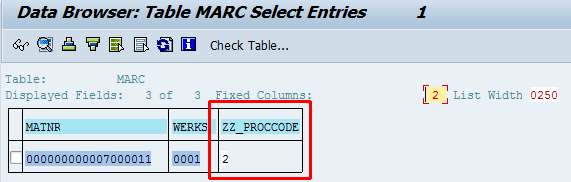
Check in SE16 that data has been saved correctly in the MARC table
Modification of new fields data in PAI
In case you need to process or modify data of your new fields (or also data of standard fields) during PAI in MM01/MM02/MM03) you have to implement Customer-Exit EXIT_SAPLMGMU_001.
This user exit is called every time PAI is triggered.
If you need to do some error-checking during the SAVE action only, then you can surround your code with something like
IF sy-ucomm = 'BU'. "this code executed only during SAVE
* your code
ENDIF.
